The p16 label template exclusive is a specialized template designed for creating labels for laboratory samples, particularly in the field of molecular diagnostics. The template is specifically designed to accommodate the unique requirements of p16INK4a, a protein biomarker used in the detection of certain types of cancer and other diseases. The p16 label template exclusive is engineered to provide a precise and standardized format for labeling samples, ensuring consistency and accuracy across different laboratories and research institutions.
The p16 label template exclusive is a powerful tool that has revolutionized the way researchers and laboratory professionals create labels for their samples. By providing a precise and standardized format for labeling samples, the template ensures accurate identification and tracking, streamlining workflows and improving efficiency. With its customizable features, pre-designed format, and barcode compatibility, the p16 label template exclusive is an indispensable tool in laboratory research and diagnostics. By following the tips and best practices outlined in this article, researchers and laboratory professionals can make the most of this innovative tool, unlocking its full potential and advancing their research and diagnostic capabilities. p16 label template exclusive
In the world of laboratory research and diagnostics, accurate identification and tracking of samples is crucial. One essential tool in achieving this is the p16 label template exclusive. This powerful template has revolutionized the way researchers and laboratory professionals create labels for their samples, ensuring precise identification and streamlined workflows. In this article, we will explore the world of p16 label template exclusive, its benefits, features, and applications, as well as provide a comprehensive guide on how to make the most of this innovative tool. The p16 label template exclusive is a specialized
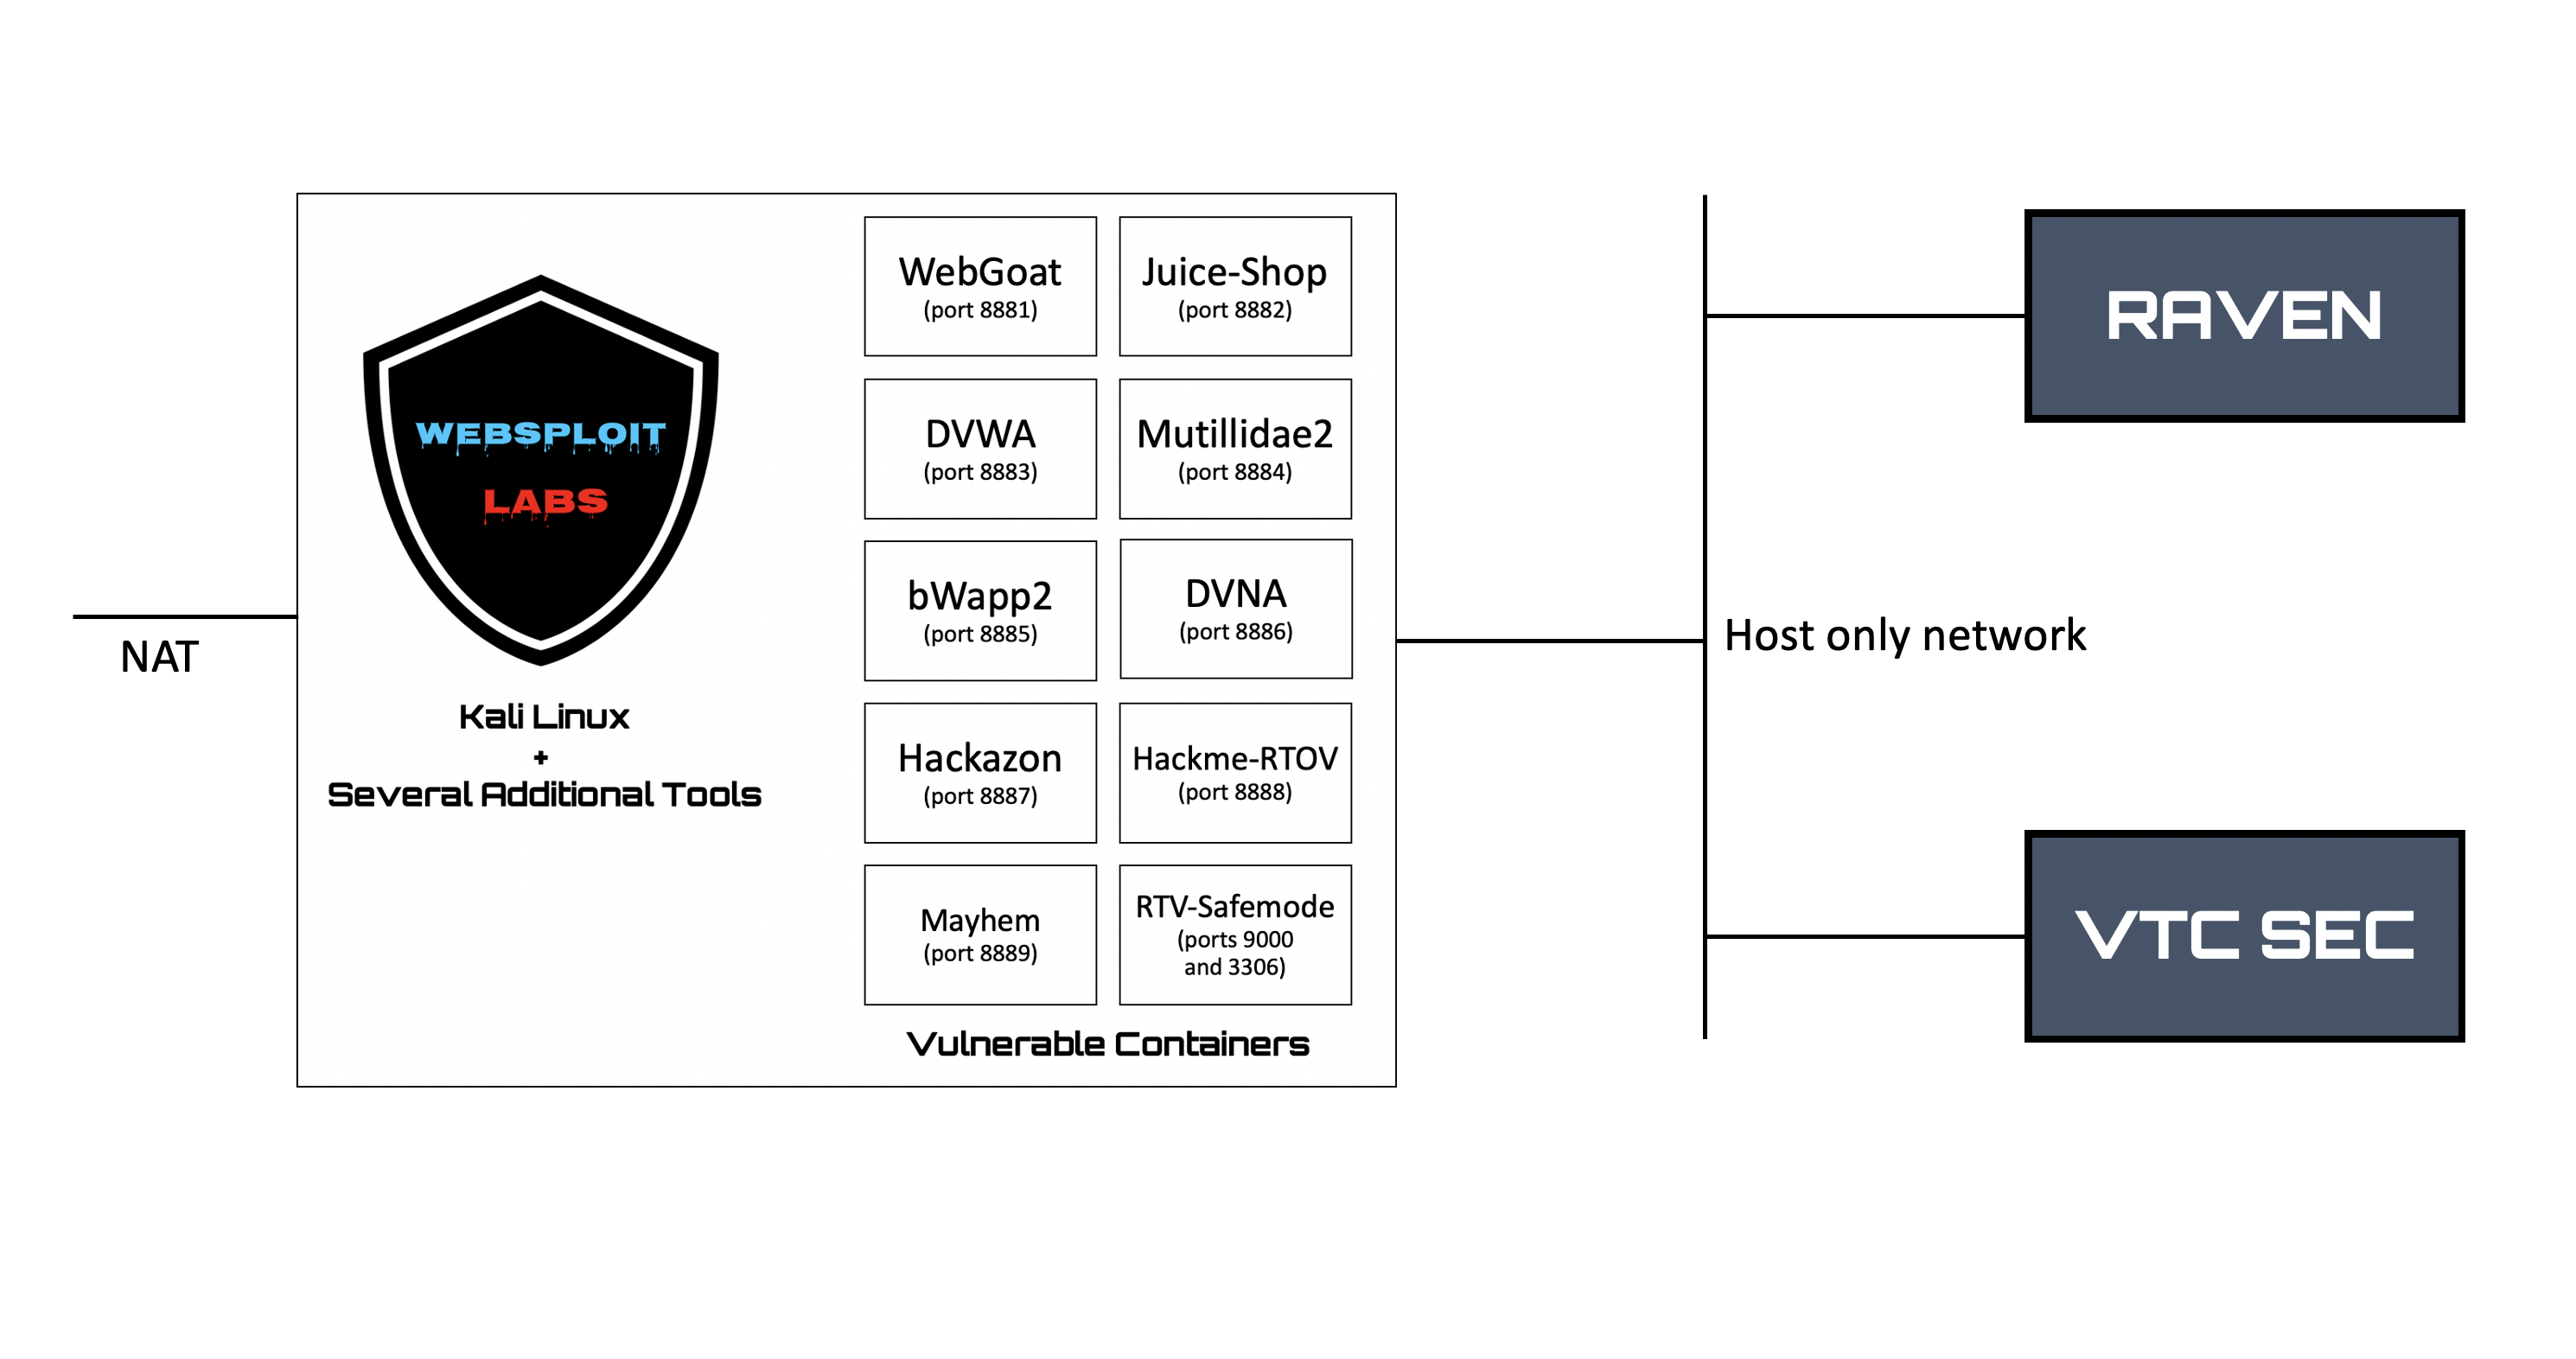
Kali + Additional Tools + Vulnerable Applications in Docker containers...
A vulnerable VM that you will use to perform a full assessment (from reconnassaince to full compromise)
Another vulnerable VM that you will use to perform a full assessment (from reconnassaince to full compromise)
This video explains how to setup the virtual machines in your system using Virtual Box.
The diagram below shows the lab architecture with WebSploit Full version, Raven, and VTCSEC. The VMs were created in Virtual Box. It is highly recommended that you use Virtual Box. However, if you are familiar with different virtualization platforms, you should be able to run the VMs in VMWare Workstation Pro (Windows), VMWare Fusion (Mac), or vSphere Hypervisor (free ESXi server).
You should create a VM-only network to deploy your vulnerable VMs and perform several of the attacks using WebSploit (Kali Linux), as shown in the video above. You can configure a separate network interface in your WebSploit VM to connect to the rest of your network and subsequently the Internet. Preferably, that interface should be in NAT mode.
Stay in Touch with Omar!